According to the same study published on Francenum.gouv.fr, companies have many expectations when it comes to online visibility. Nevertheless, action is minimal. 67% of companies declare that they are not taking any advertising action! Which is rather problematic given the business expectations of these same companies…
To reap the rewards of a digital presence, it’s important for your business to use inbound or outbound advertising methods.
Among the various means of communication, social networks have a role to play in your customer acquisition or loyalty strategy. Social networks are real communication tools, accessible and more or less easy to use, with a number of advantages:
- Opportunity to use media and social networks to communicate brand image, corporate values and storytelling. This presence offers companies the opportunity to control their communication and e-reputation (an essential element when considering the new customer journey).
- Create relevant content with real added value through an inbound marketing strategy. Businesses can establish themselves as experts in their market and become essential sources of information.
- Customer relationship management and development. Having visibility on networks and maintaining exchanges on these platforms creates a relationship of trust and proximity between consumers and companies. This digital presence enhances the customer experience and can strengthen customer loyalty.
- Gain new customers or acquire leads. Audience-targeted advertising and creative advertising have proven their effectiveness. You still need to make sure that your ad formats are appropriate.

Before diving headlong into all the existing social platforms, review your business objectives and then define the most suitable social networks where you need to be present.
According to Content Marketing Institute :
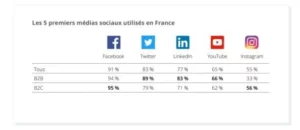
- 97% of companies are present on Linkedin
- 87% are on Twitter, a network that encourages fast, instant communication
- 86% on Facebook
- 30% on Instagram
For each platform and social network, the creation of your profile needs to be carefully thought out. Think about your target audience.
For example, as a manufacturer, you may not see the point of having a Facebook page. And yet, your company needs to adapt to the habits of targeted profiles and be present in the right place.
Your future target customer is a user like any other: it’s highly likely that he spends time on his Facebook or Instagram profile and will browse this social network several minutes a day.
By the end of 2021, Facebook will have almost 40 million monthly active users in France. Infrogram
These words need to be weighed up according to your audience and the consumers you’re targeting. If your industrial activity is aimed at young people and new start-ups, your company could leverage an Instagram or TikTok account. Indeed, this target group is present on this trendy network and spends hours discovering content from their “nearest and dearest” and their favorite companies.
This will make it easier to reach these audiences with targeted advertising.
When thinking about your B2B digital strategy, ask yourself the right questions and adapt to your audience. What are their habits? What do they like? What social networks are they on?
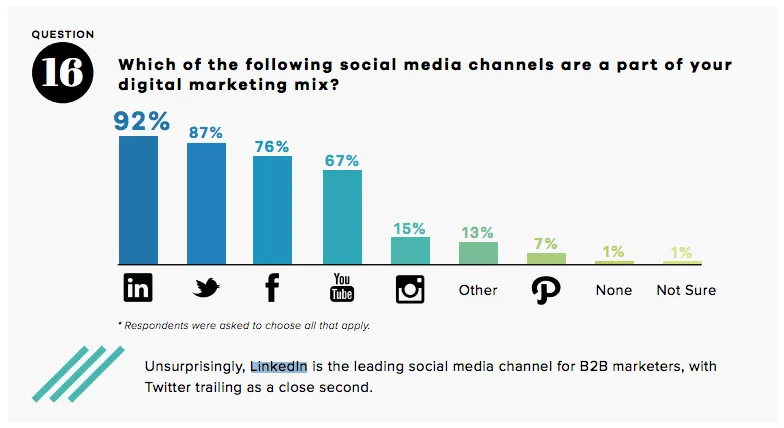
“Which social network is part of your marketing mix? ”
Linkedin is the social network for businesses.
For B2B communication, a professional Linkedin page for your company is more than recommended.
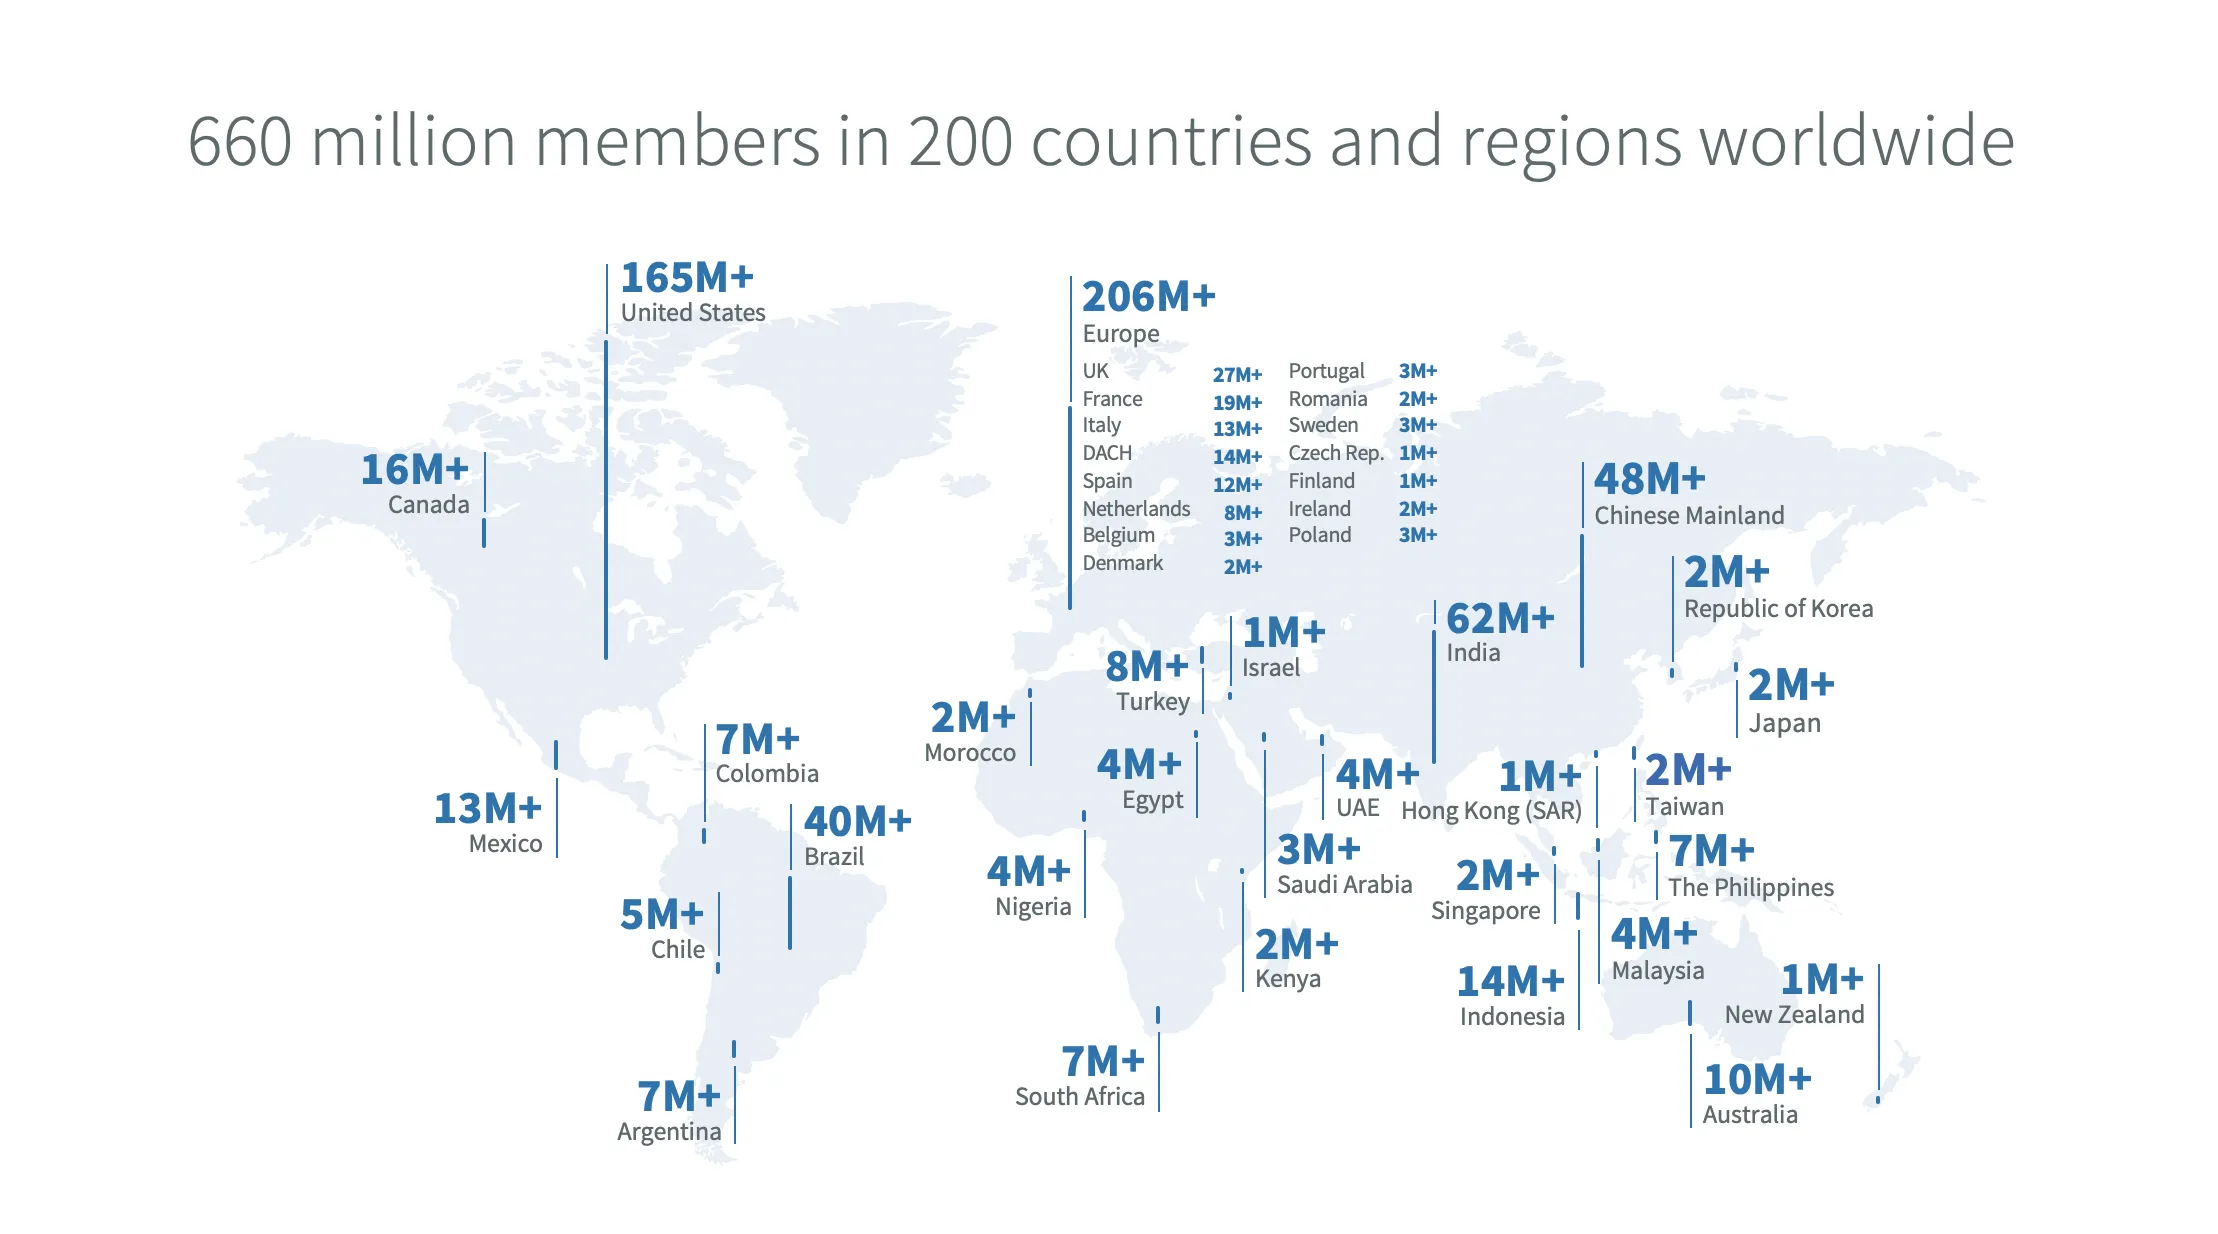
According to Social Media Today, 610 million professionals are registered on LinkedIn worldwide, including over 19 million in France.
For Develop your social campaigns on Linkedin it’s here …
Your company has the opportunity not only to make contact with strangers in your sector, but also to recruit sought-after profiles. The advantage here is to expand your circle and your network, develop your reputation and ensure your presence on the market.
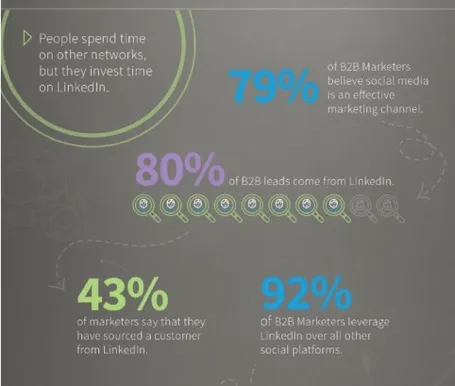
Linkedin is digital word-of-mouth, but it’s also a platform for promoting your offers with highly targeted, qualified advertising.
In addition to communicating with users, highlight your latest products and news. Highlighting this information invites users to want to know more about you. You can also use the Linkedin Pulse function, which allows you to create articles and thus generate engagement around you.
To take things a step further, Linkedin offers companies the opportunity to invest in advertising. These campaigns should be integrated into your B2B strategy if you want to acquire new leads or work on your brand image.
An interesting and increasingly popular approach is to use influencers to spread the word about your brand or product.
Influencers on Linkedin are less well known than the Kardashian’s, but have important communities for your business.
You can find this type of profile directly on Onalytica.
In his article “Définir votre stratégie d’acquisition de leads” (Defining your lead acquisition strategy), Emeric Lefort takes up several key concepts for your B2B actions. I recommend you read it.
The social network Twitter enables companies to communicate quickly and directly.
It’s strategic to use it for conferences, events or just to react to news. These elements require immediate action to generate interest. Your company needs to react “on the fly”.
With tweets, beyond communicating about your offer and your entity, you have the opportunity to take a stand on broader issues. To strengthen the link and identification with your company, highlight your values and the causes that are close to your heart.

Now belonging to the same group, Facebook and Instagram have similarities for showcasing your business and solidifying your online presence.
Why are these two networks important for creating a place for yourself in the market? According to a Business Insider study, “in 2017, one in three French companies with fewer than 250 employees still doesn’t have a website”.
Take advantage of the lack of development of companies on these networks to become the forerunner in your industry.
It’s a fact: consumers are present on social networks. Don’t miss this opportunity to stay ahead of your competitors.
These two networks are the most widely used in the world.
You have a 99% chance of finding your target.
Two advantages to using Facebook and Instagram:
- The ability to create professional profiles. Through them, you can be more precise in terms of audience and have access to statistics on your publications.
- Humanize your approach with stories and Live: even if the aim of your B2B strategy is to sell, show that beyond digital there are humans with feelings who put themselves in the shoes of consumers.
Faced with so many users, you might think it’s a closed territory. A space where you’ll never fit in. But that’s not true! It’s all about differentiating yourself and integrating your business identity into your publications. It’s not easy, and it takes consistency.
-
- Even if it’s a B2B approach, speak in a friendly, even funny tone. Don’t take yourself too seriously by using a solemn tone. Social networks forge links between consumers and companies. Don’t distance yourself from users.
- Don’t scare people away with pop-ups, violent colors or spam. On the networks, the aim is to have a good time and interact with nice companies.

- Be consistent and offer coherent content that resembles your company. To make your mark, have a real identity. Depending on your resources and organization, you can focus on creativity and variety in your publications: videos, interviews, photos, montages, infographics, quotes, customer feedback, behind-the-scenes stories, teams… You’ve got carte blanche!
According to Marketing Charts, social media content and blog posts/short articles are considered to be the most influential in the early stages of the buyer’s journey in building brand awareness. (“social media content (95%) and blog posts/short articles (89%), have been found to be the highest performing at the beginning of the buyer’s journey in building brand awareness”).
Put yourself in the consumer’s shoes: what do they need to know about you? What information would you like to have in their place?
As a guide, here are the best times to post :
LinkedIn: from 7am to 8am then from 5pm to 6pm
Twitter: at 3pm then from 5pm to 6pm
Facebook: at 9am, 1pm and 3pm
Instagram: from 8am to 9am and 5pm
Bonus: lunchtime is always a good time to post. While eating or after lunch, the reflex of many people is to consult the networks.


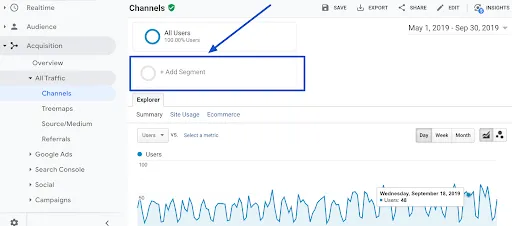
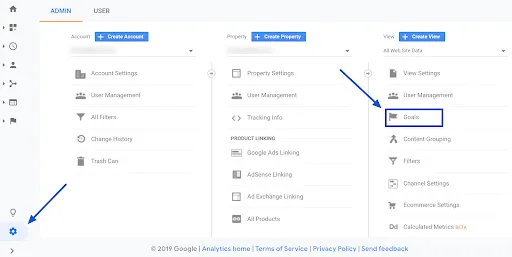
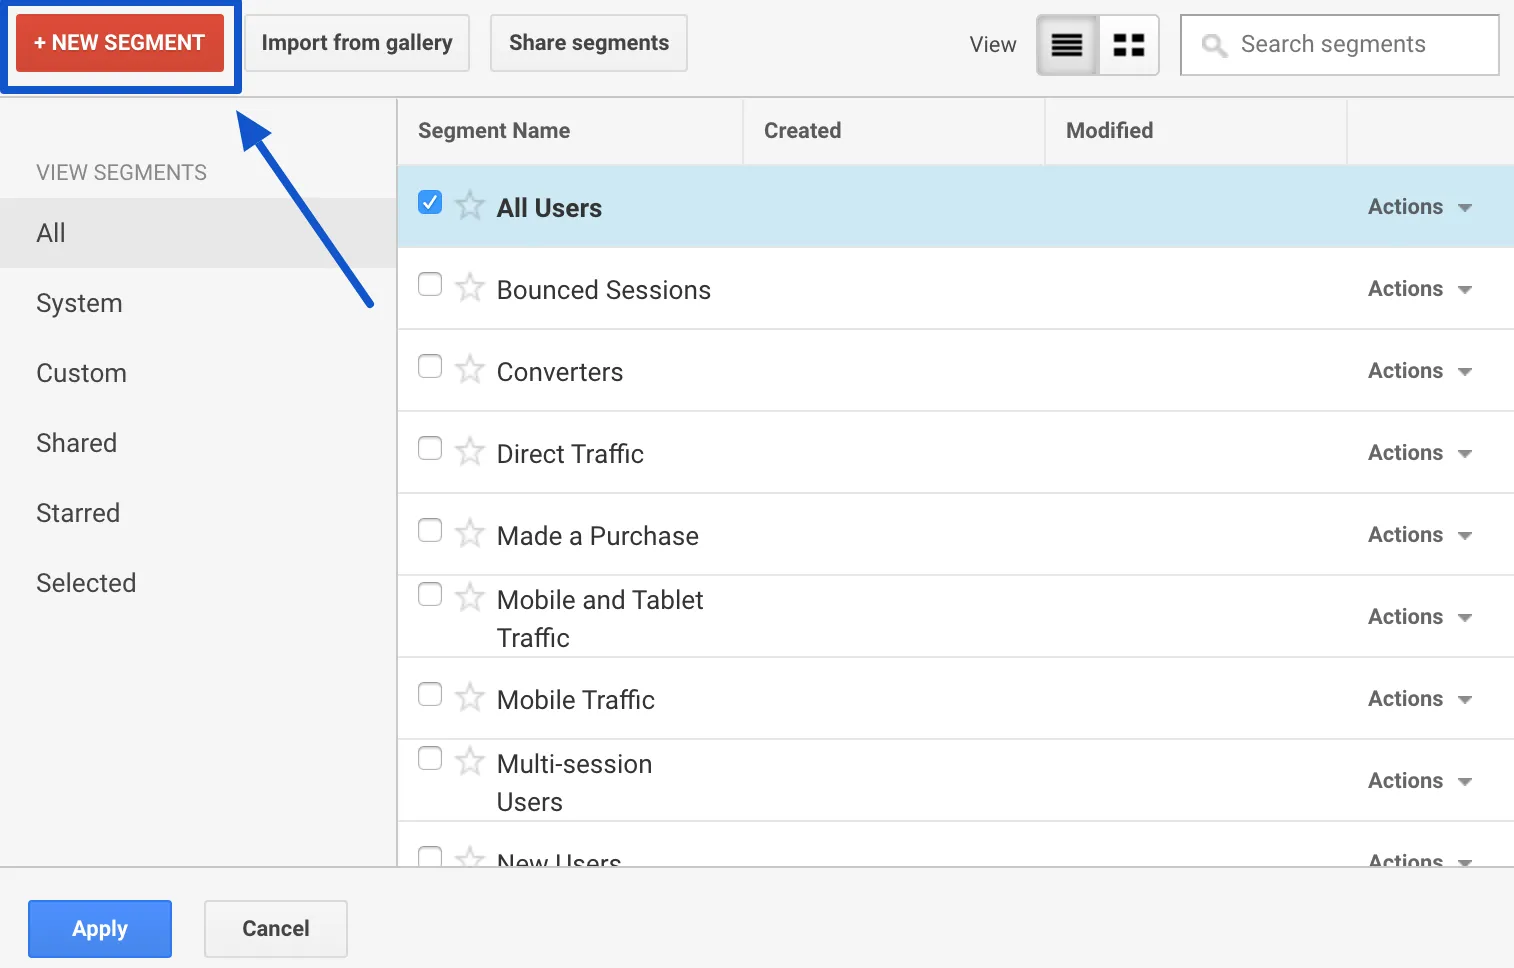 Then click on “Conditions in the “Advanced” menu on the left.
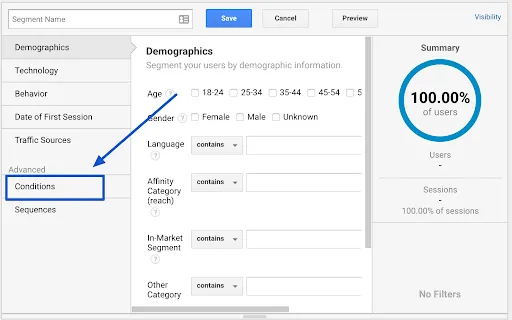
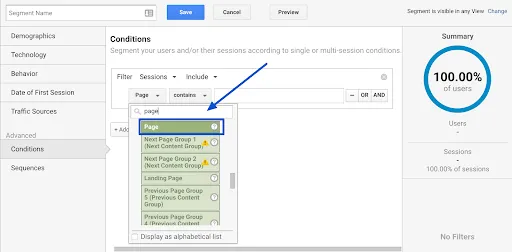
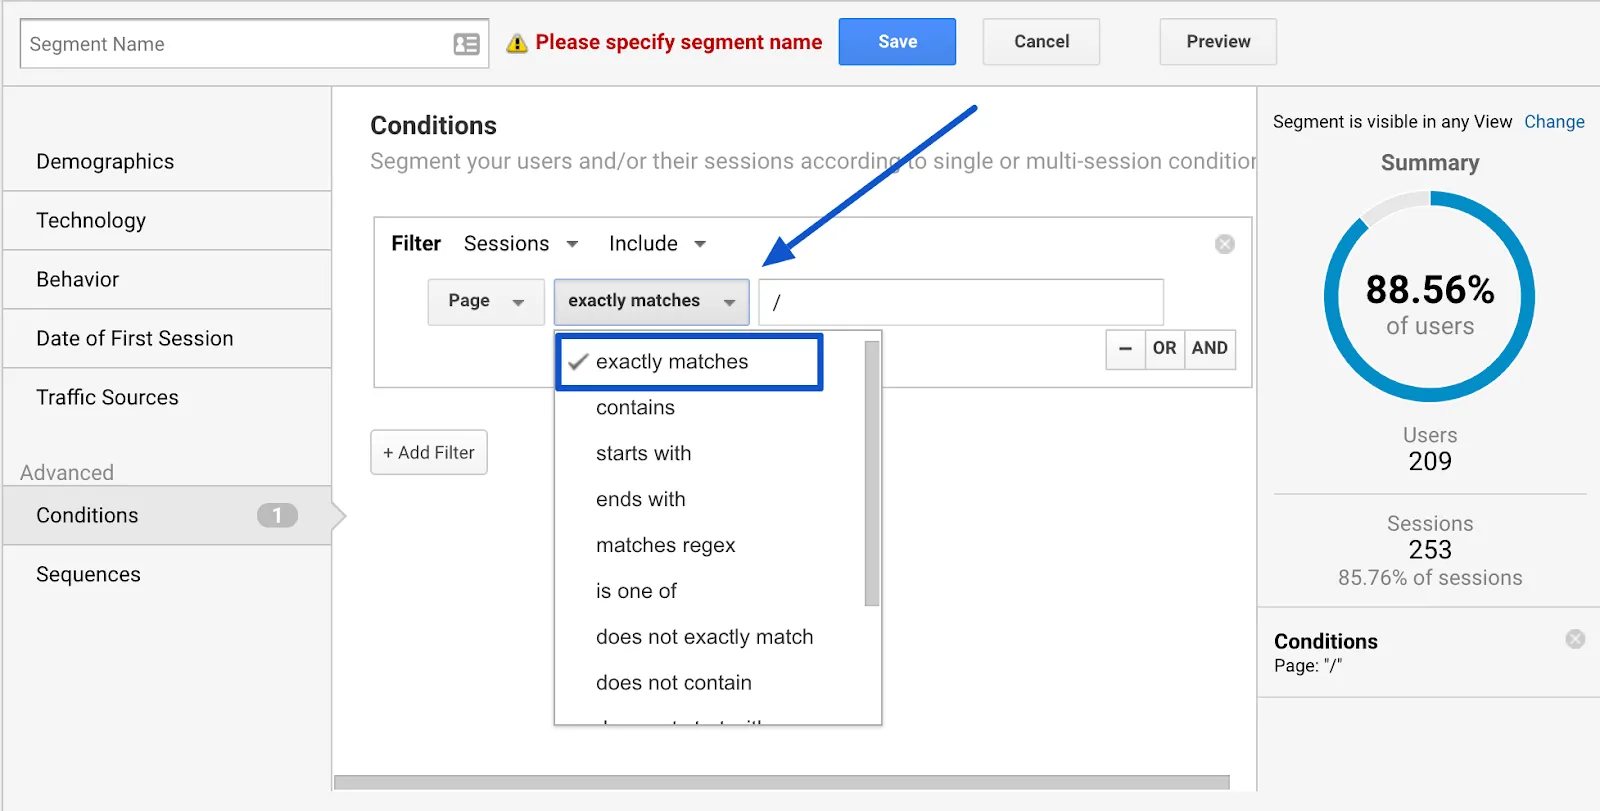
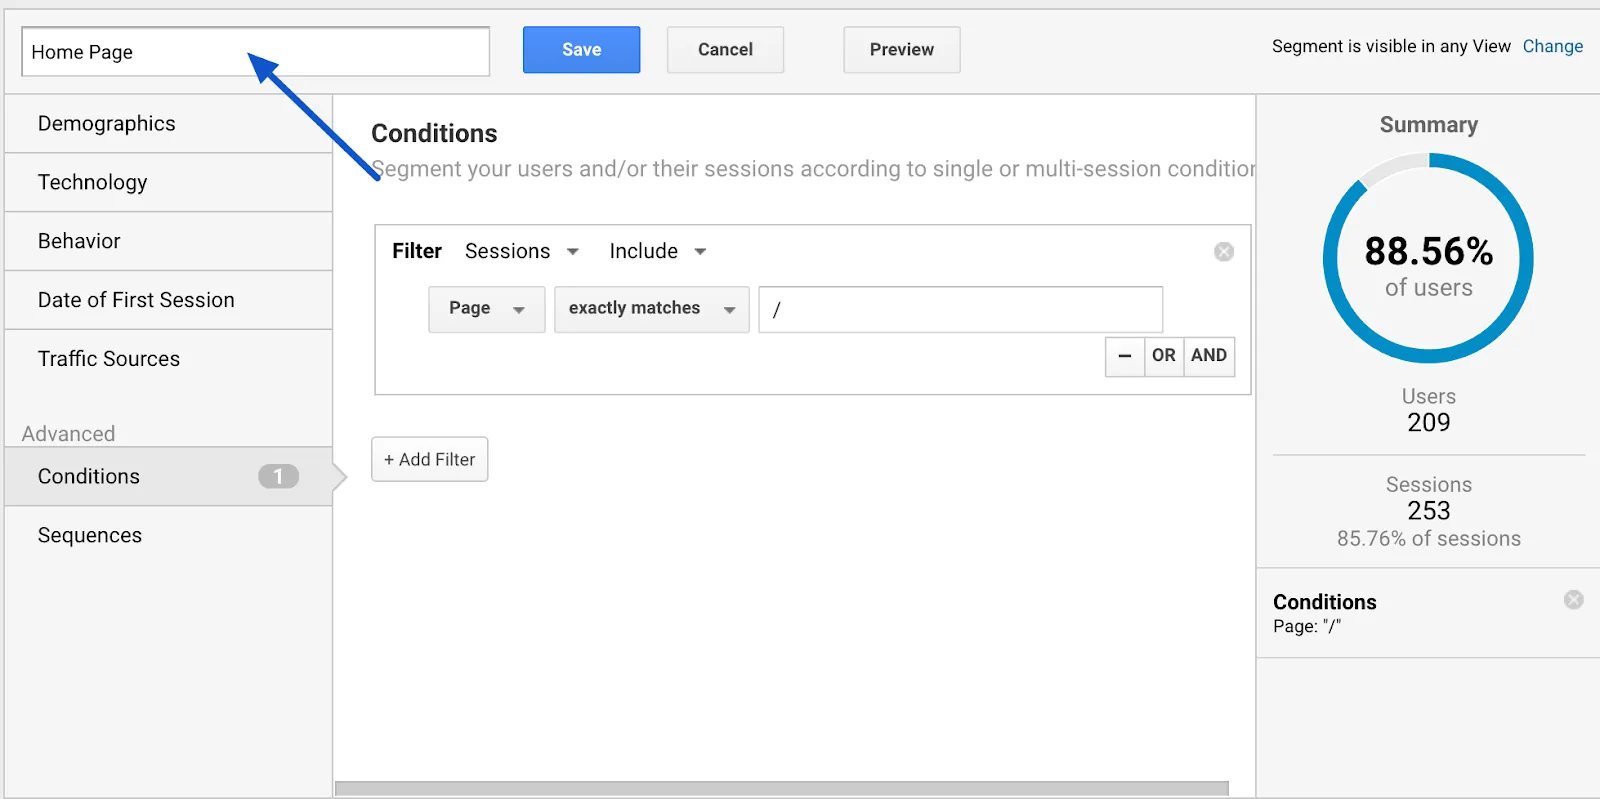 Name your segment explicitly: here, “Home Page”.
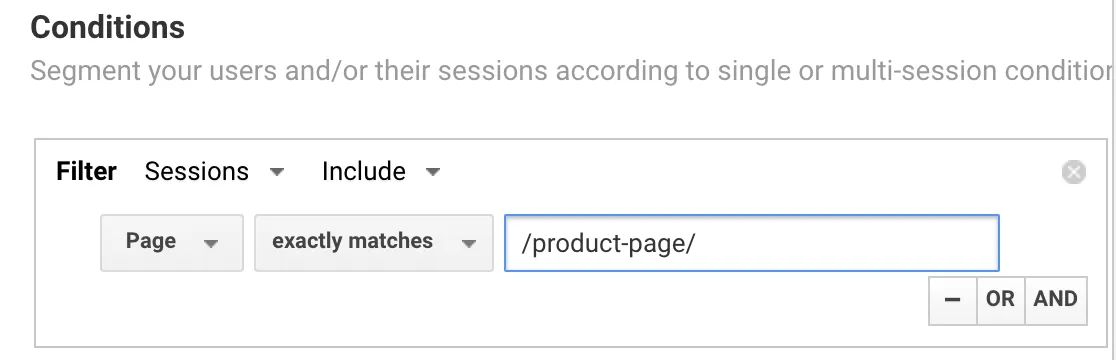
 Save the segment as “Product Page” and save.
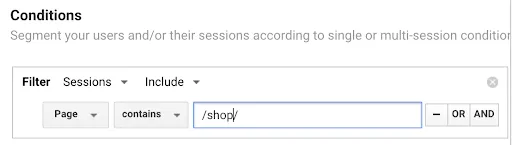
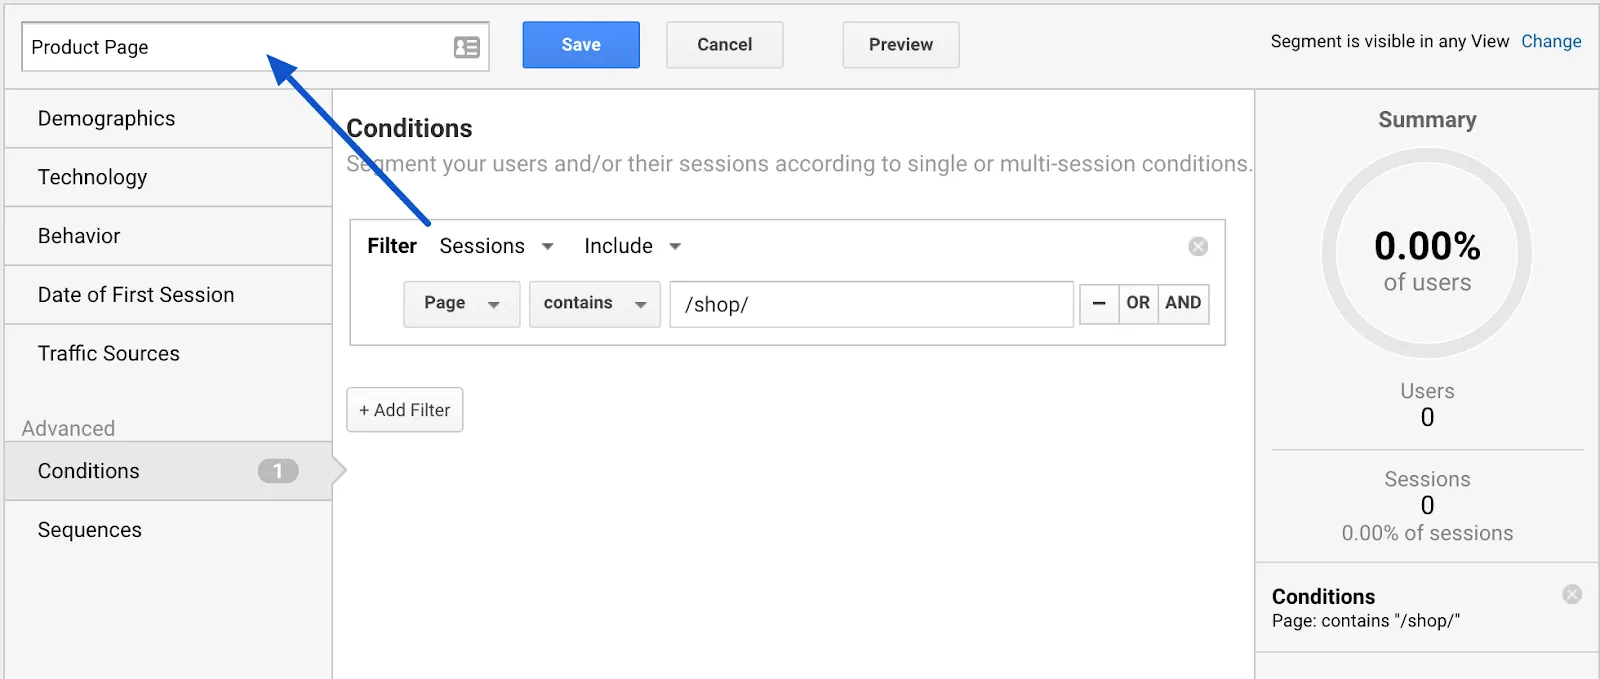
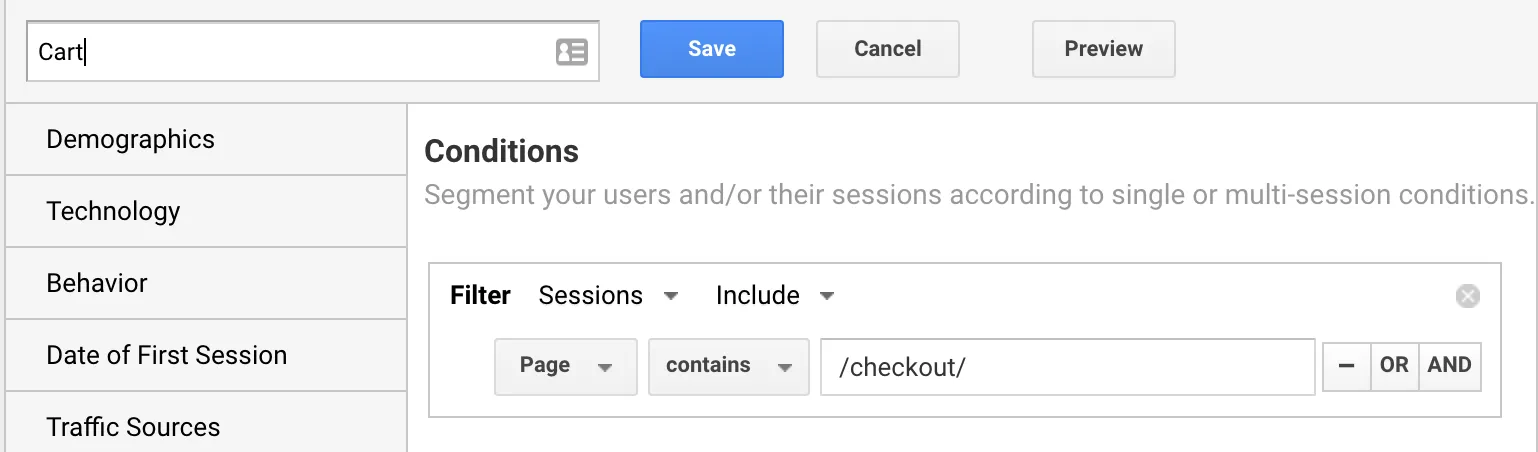 Shopping Cart” page segment
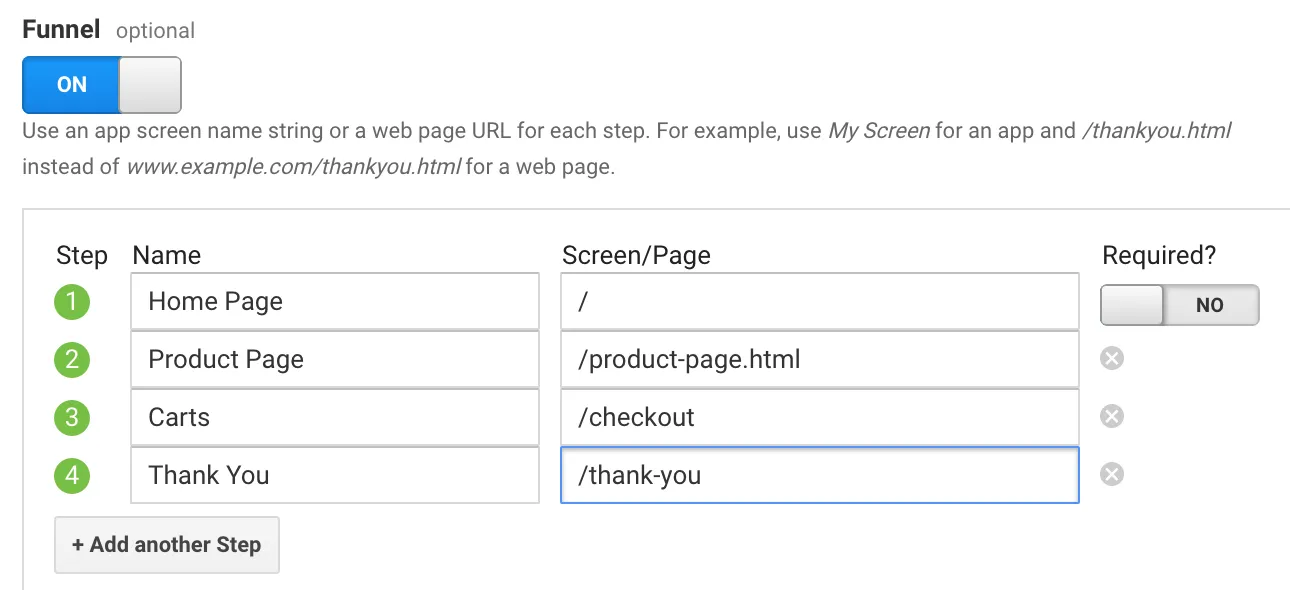
 In the last screen, we’ll use our thank-you page as the URL and select “Equals from the drop-down menu:
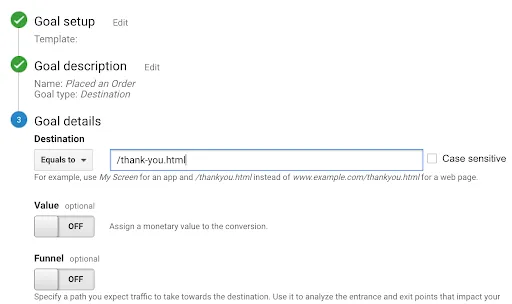 You now have the option of defining a value for each conversion. If you use your website primarily for lead generation, your revenue is probably not captured by Google Analytics. You can still estimate it by setting the Value field to ON, then specifying an amount. For example, if you’re using this goal to track white paper downloads, you can assume that, on average, each download is worth $100 to your business, so you should enter that. Again, this field is optional.
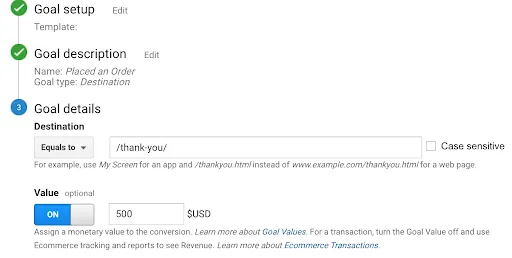
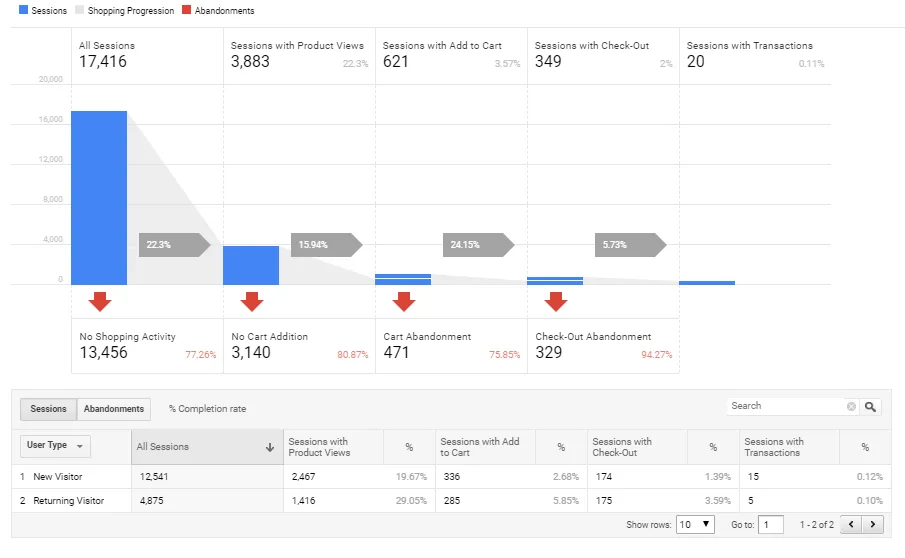
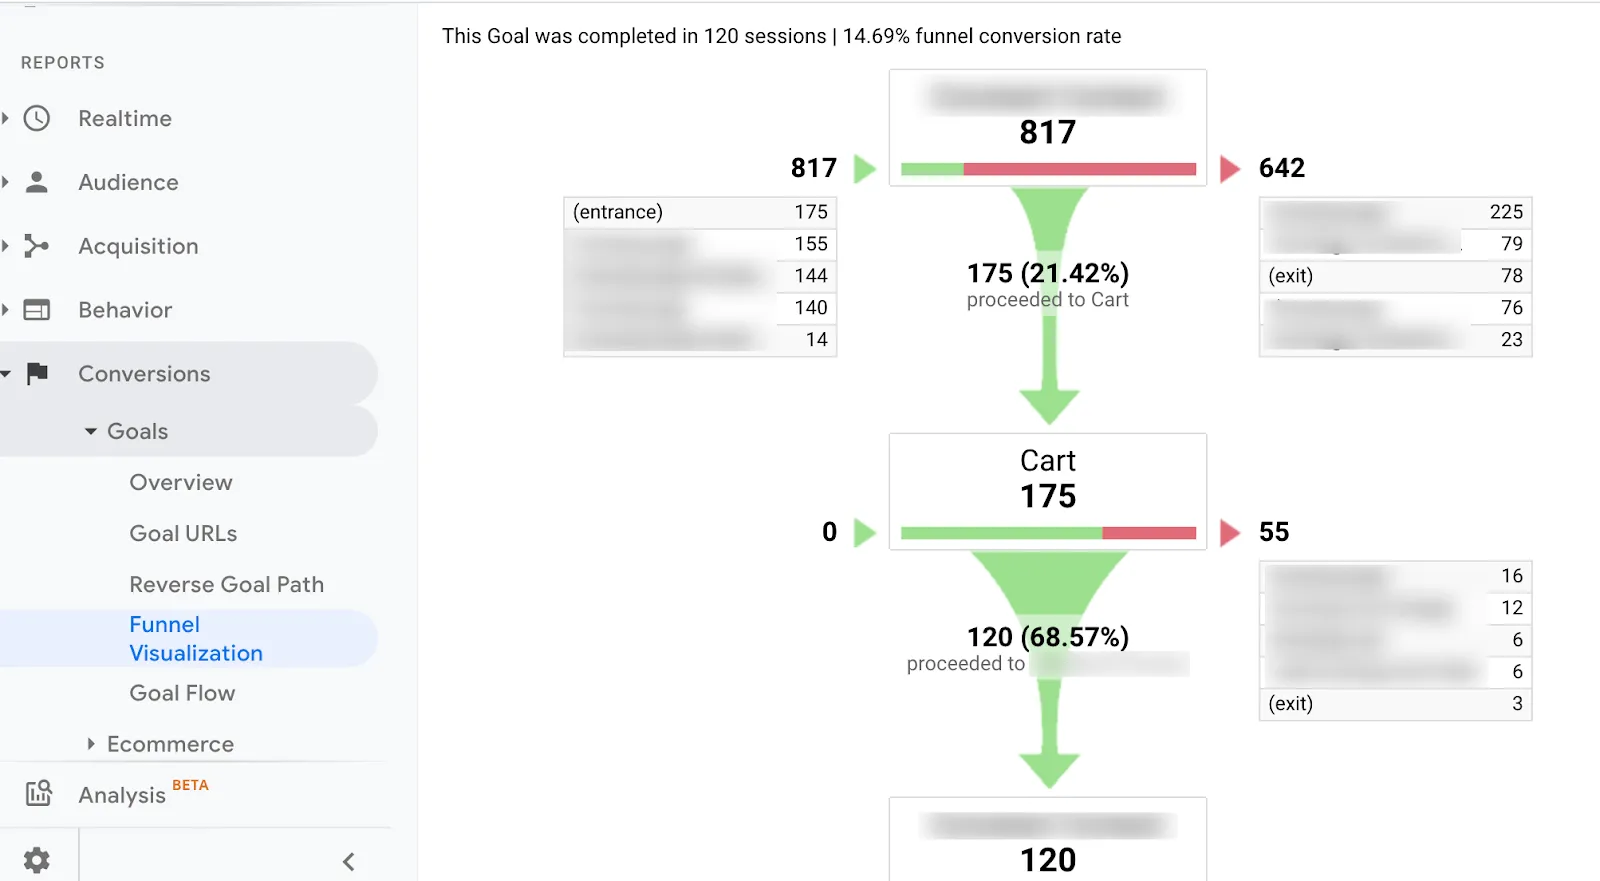
 Finally, click on “Check this goal” to verify your work. Next, return to Conversions > Goals and you’ll see that you can now view the Funnel Visualization report where it shows you a visual representation of your funnel:
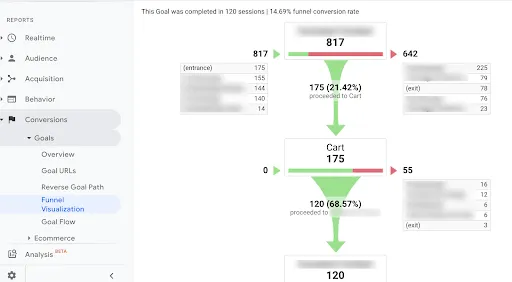

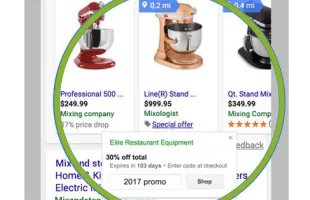
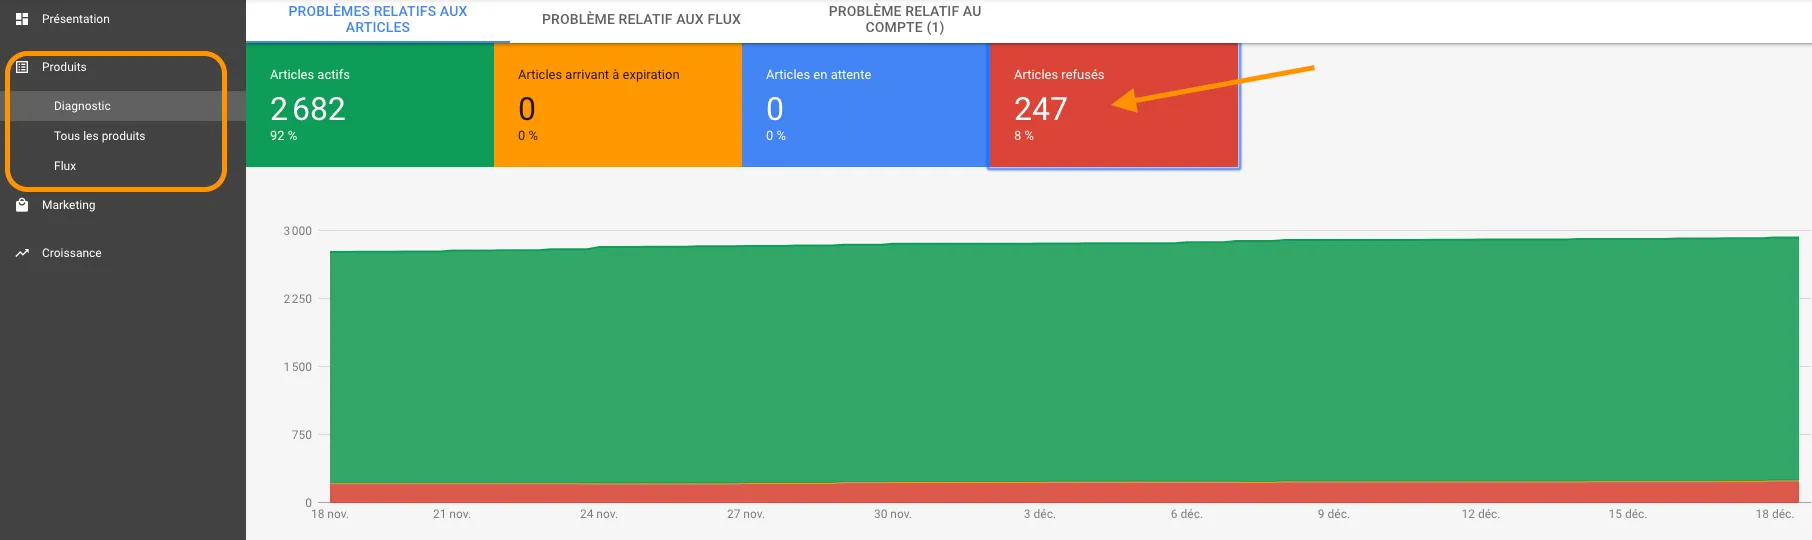
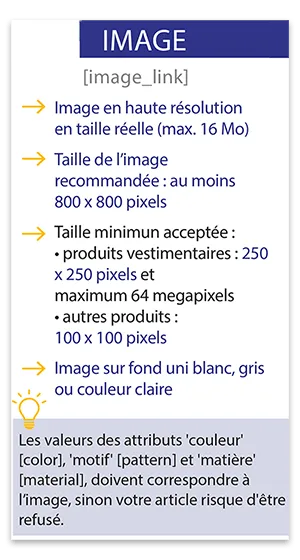
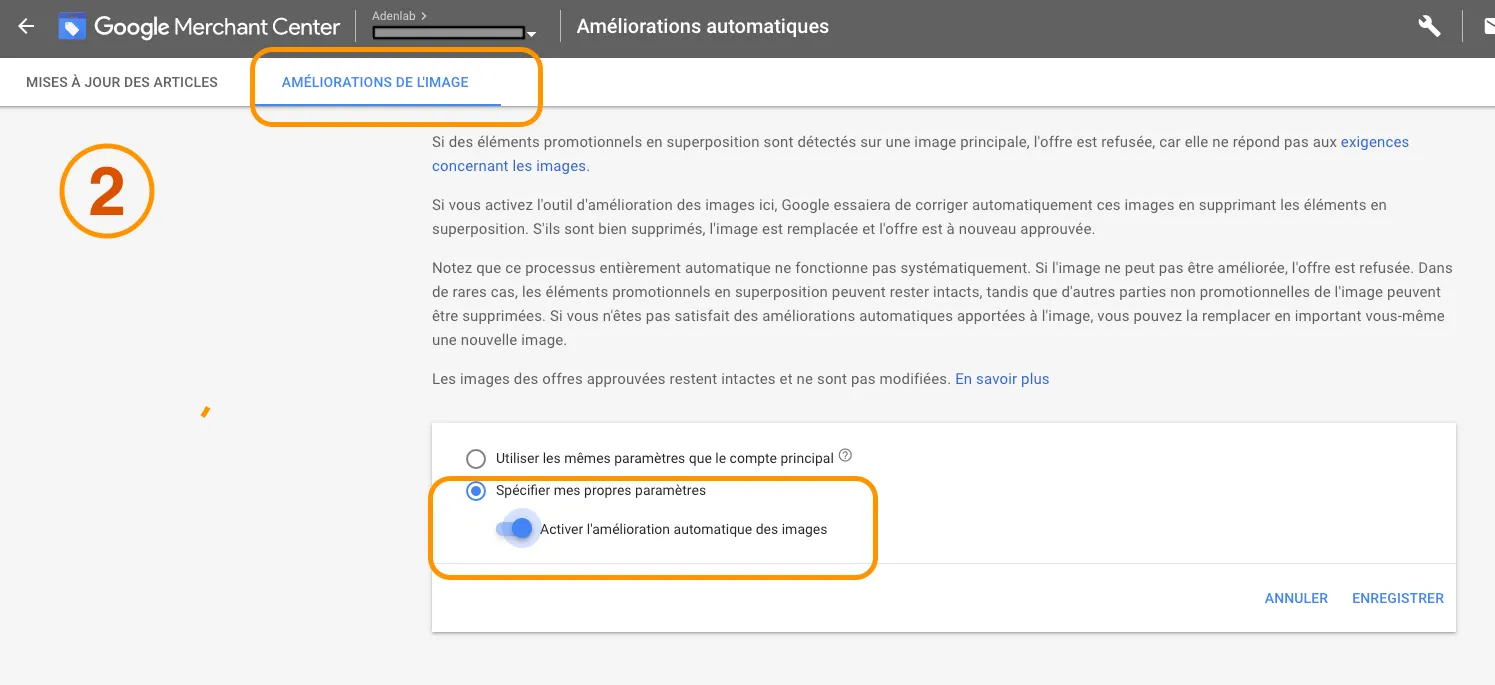
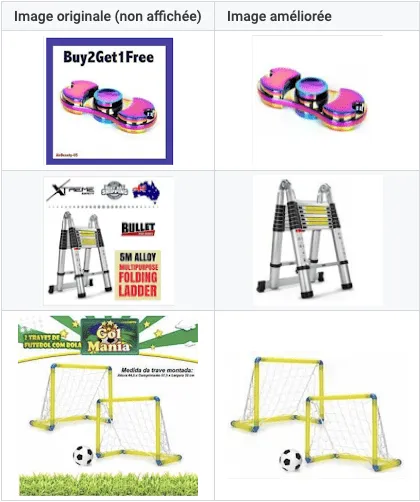 To do this, go to your Merchant Center and activate the “automatic image enhancement” option.
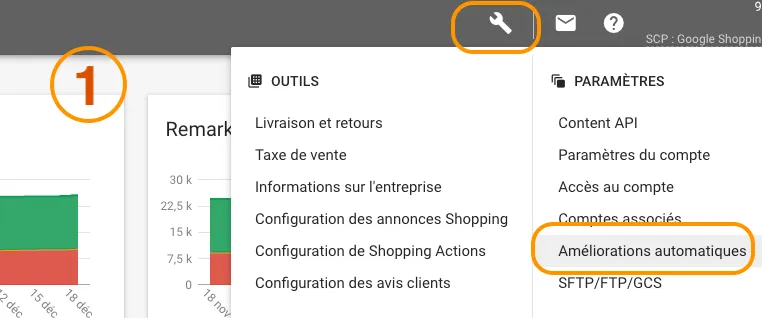

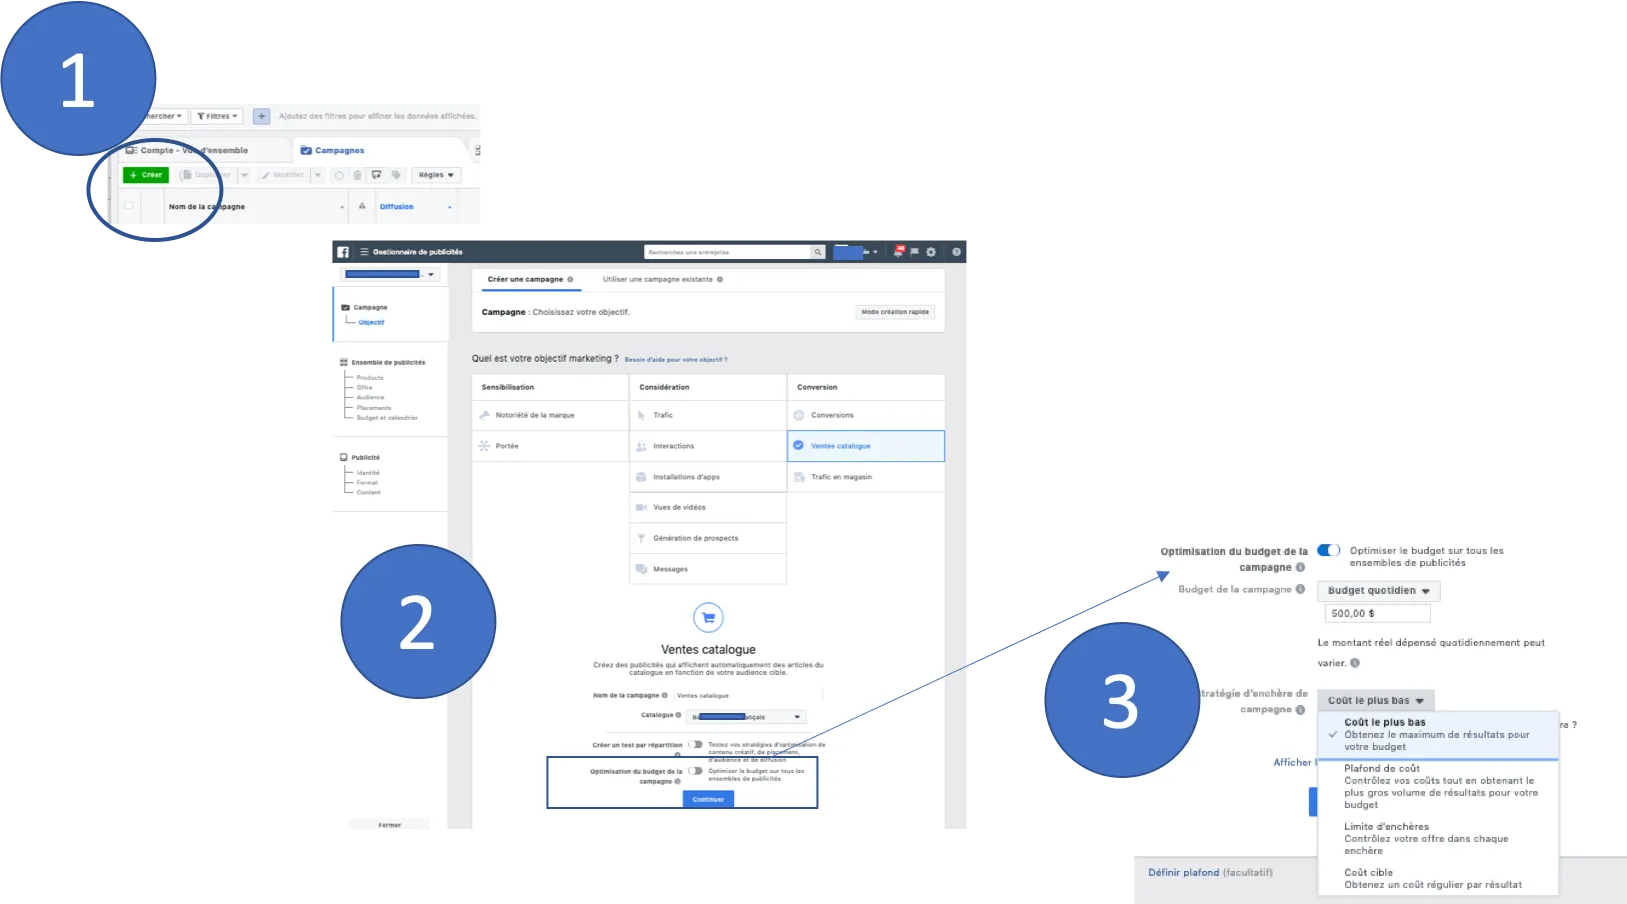 Creating a Facebook campaign
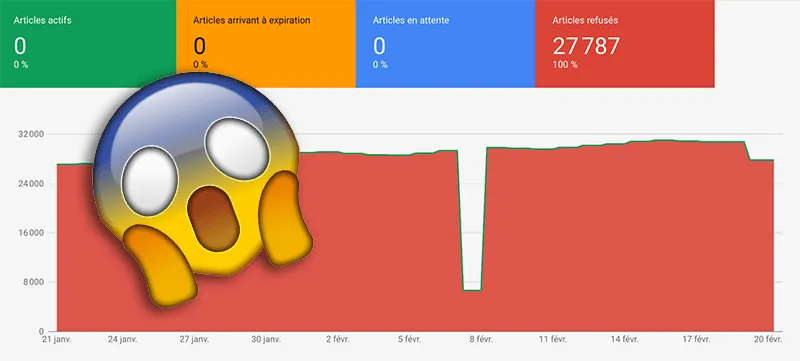
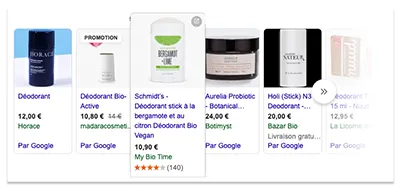
 Merchant Center price watch
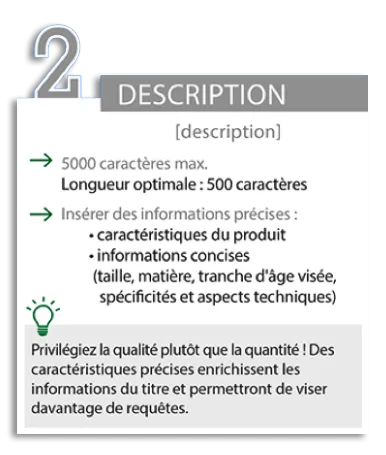 Product description in the Shopping feed